 Getting Started
This will cover the how to get your application set up to use Gorgon.
Prerequisites
To use Gorgon in your project you will need the following:
- Visual Studio 2022 17.0 or better.
- .NET 6.0 or better.
- Ideally, C# (language specification v10.0 or better). However, it should work with Visual Basic.NET as well as any other .NET enabled language as long as .NET 6 is supported.
- For graphics functionality - Direct 3D 11.2 or better.
- Windows 10 v1703 Build 15603 (Creators Update) or newer.
Creating a project
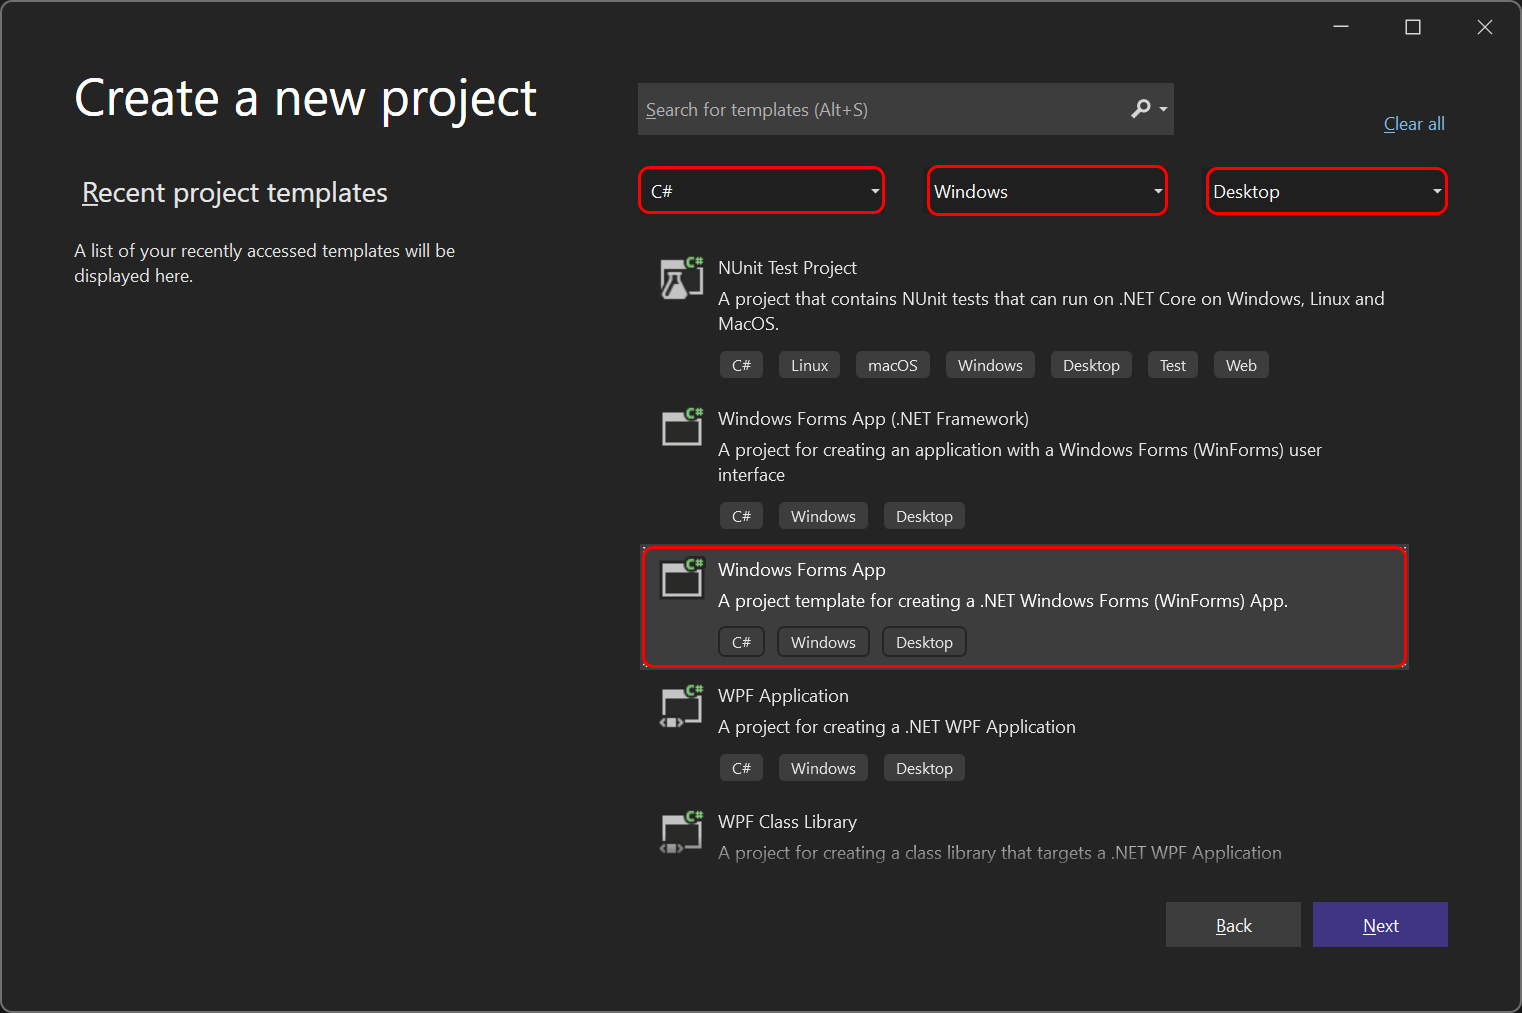
Create a new project by filtering the list for C#, windows and desktop project templates.
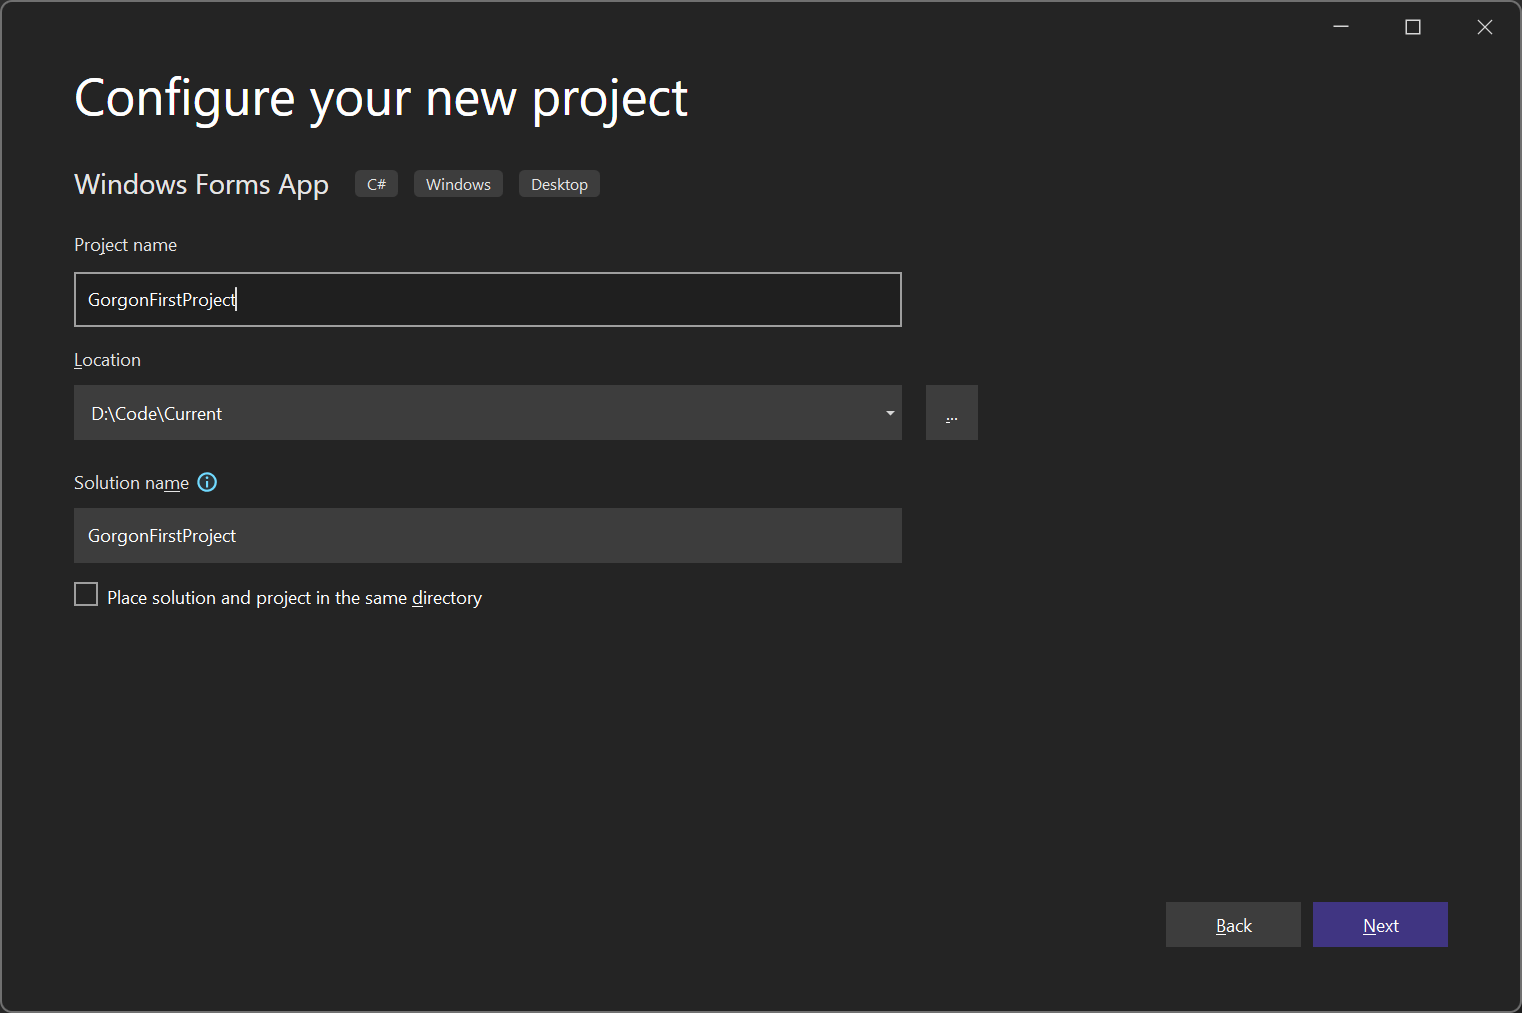
Then Click Next. On the next page, name your project (we've chosen GorgonFirstProject) as our name.
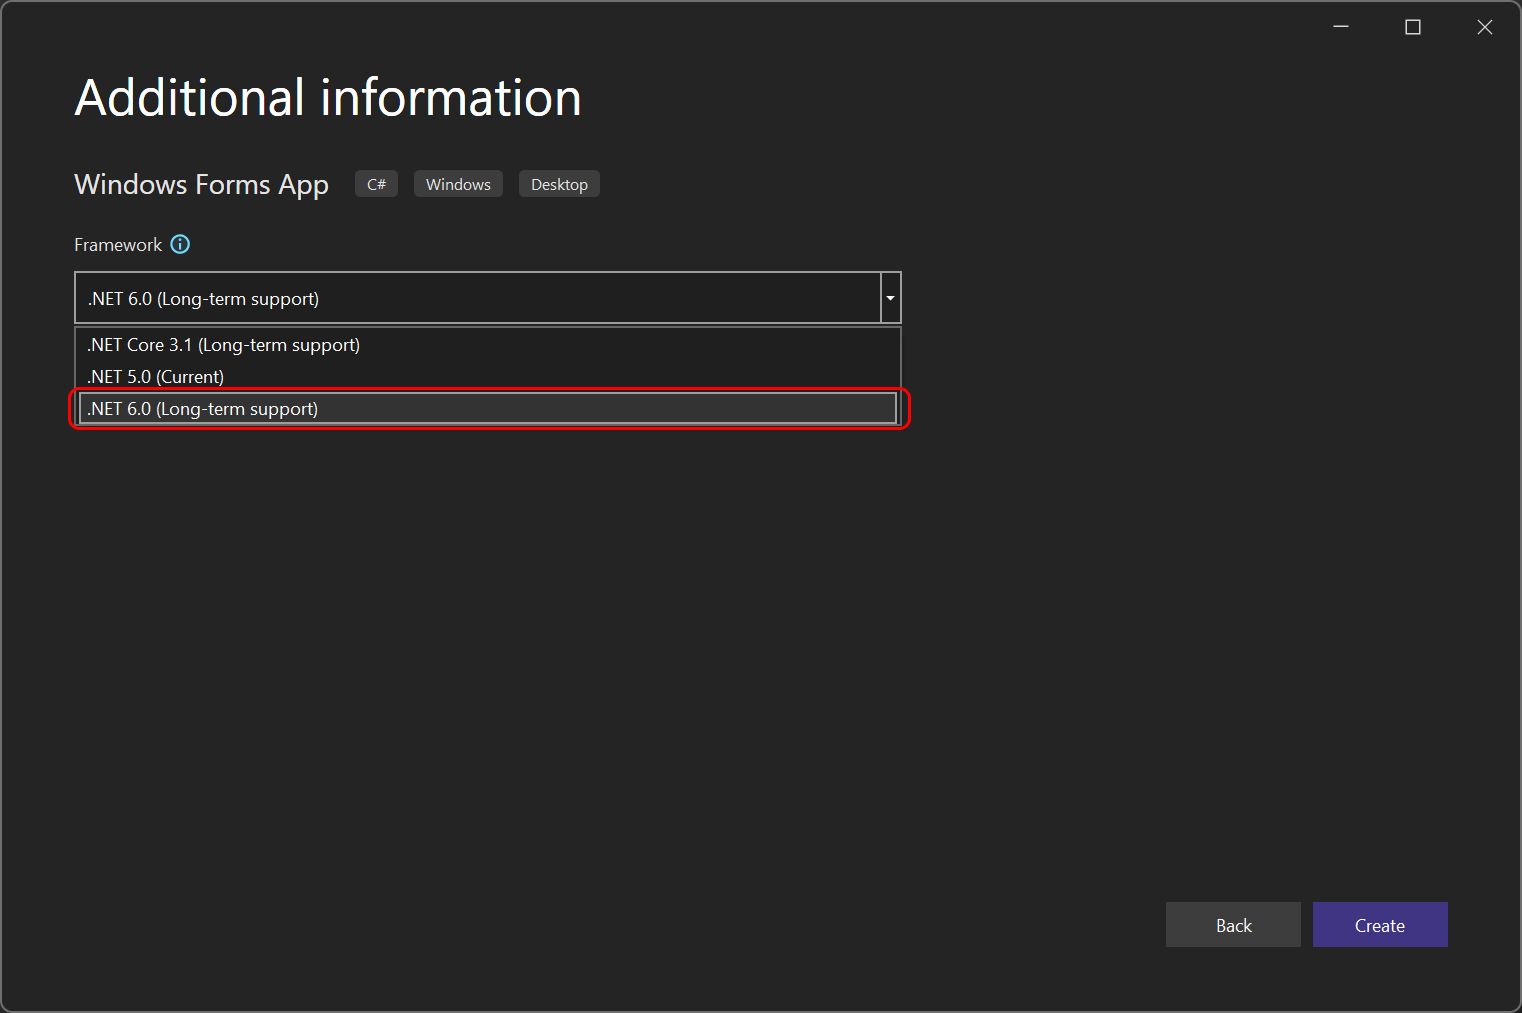
Click Next again and on the final page, select .NET 6.0 (Long Term Support) from the drop down.
And finally, click Create.
Project manifest
An application manifest must be created for the project. We need perform this step because without it Gorgon will not be able to properly detect which version of Windows we're using, and applications will fail to run. This is also required for .NET to use DPI aware functionality.
- Right click on the project and select
Addand thenNew Item... - Search for the manifest template type and select it.
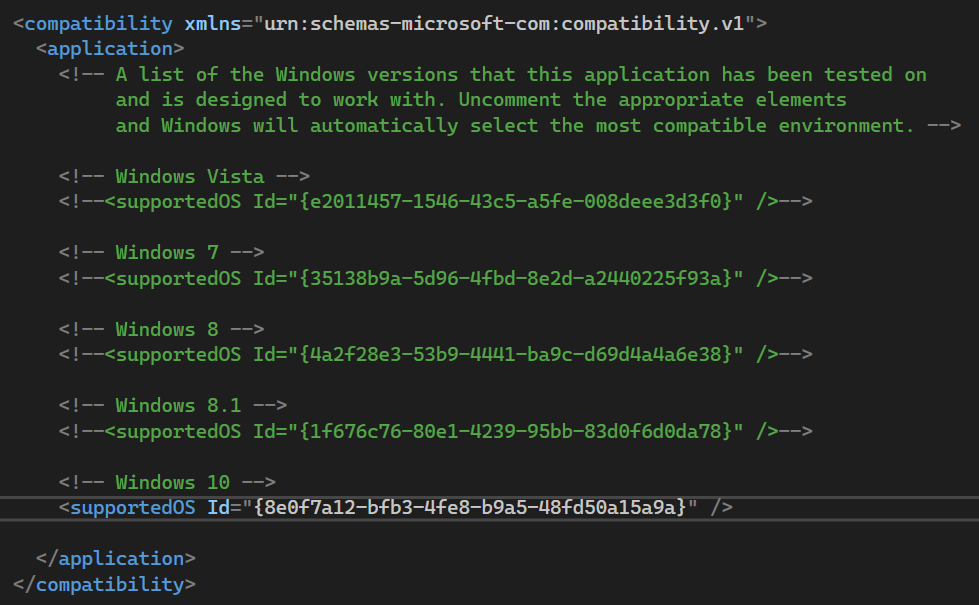
- When the XML document for the manifest appears, uncomment the
<supportedOS Id="{8e0f7a12-bfb3-4fe8-b9a5-48fd50a15a9a}"/>item. - Save the file.
You should have this:
Adding Gorgon to the project
There are 2 ways to add Gorgon to your project, choose whichever works best for you.
Nuget
Gorgon is available on Nuget for your convenience. This allows applications to easily keep up to date with the latest versions.
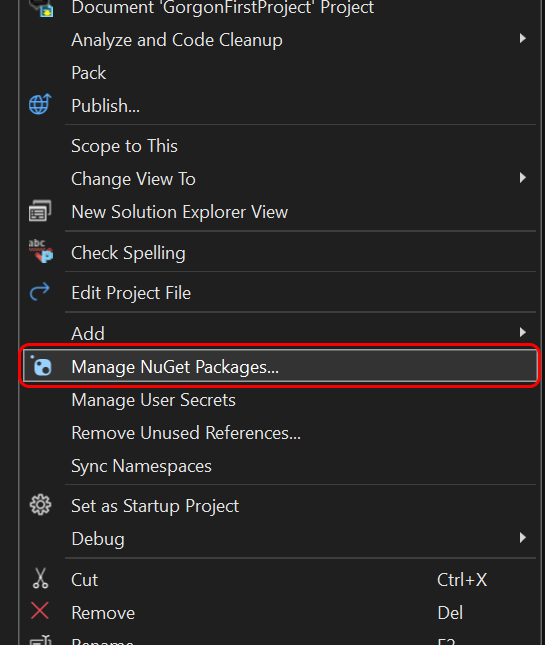
To add Gorgon as a Nuget package, right click on the Project in the solution and select Manage NuGet Packages...
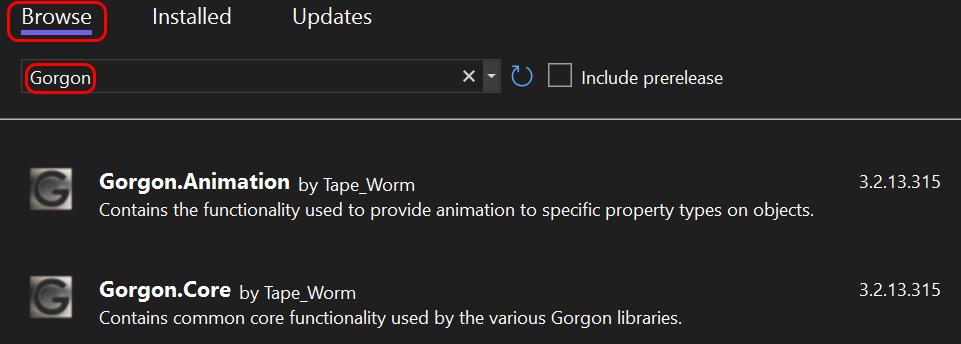
When the NuGet package manager appears, ensure that you are on the Browse tab and type "Gorgon" in the search bar. You should see a list of Gorgon's packages like this:
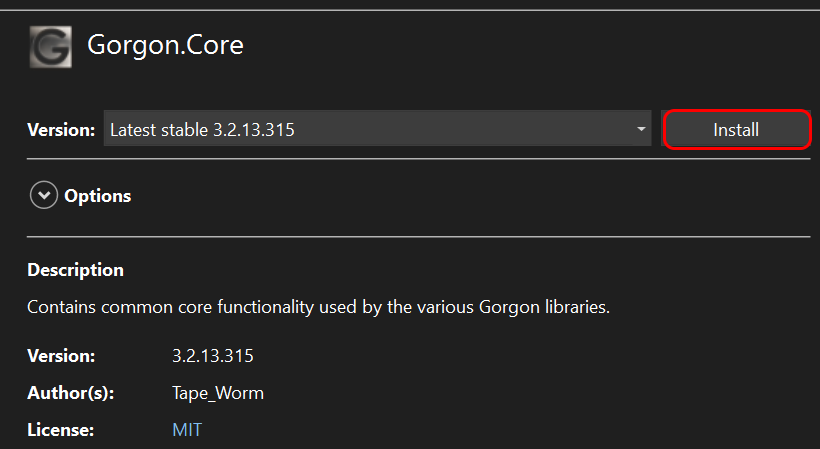
Now, select the Gorgon.Core package and click Install on the right hand side:
Do this for each package you would like to install (or all of them). All dependencies such as SharpDX will automatically be installed with the Gorgon packages.
Note
The nuget packages do not contain the Editor application for creating content. To get the editor, visit the Github releases page and download the main Gorgon zip file.
Packages that use plug ins, such as Gorgon.Input, or Gorgon.FileSystem, will have their plug in assemblies copied into a plug in directory under the output directory (e.g. C:\Project\bin\debug\plugins or C:\Project\bin\release\plugins) and you will be able to access them from there. You may move them to another location if you wish.
Manually referenced
This will explain how to set up Gorgon manually using the assemblies downloaded from the Github releases.
Prerequisites
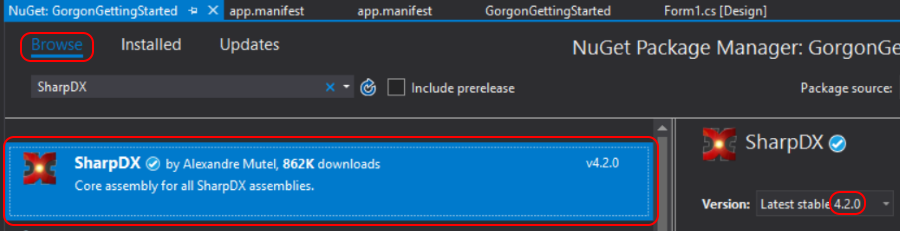
Before we add the Gorgon assemblies to your project, we'll need to get the dependencies that Gorgon requires in order to run. To do this, right click on the project and select Manage NuGet Packages...
Once the NuGet tab appears, ensure that Browse is selected and search for SharpDX.
Select the SharpDX and SharpDX.Mathematics items. These assemblies allow us to access useful utility functionality and types. The SharpDX API gives us types like rectangles, size, point, etc... and the math library allows the use of types like vectors, matrices, quaternions, etc... Gorgon makes heavy use of these types, especially for the graphics operations.
Note
Only use version 4.2.0 of SharpDX. Gorgon has not been tested with any other version.
As of this writing, SharpDX is no longer being worked on, or maintained by its creator. This means that it is possible that the NuGet packages may disappear in the future. If this is the case, check the Gorgon website for more information.

Gorgon References
Finally, we need to add references to the Gorgon assemblies. To do so, right click on the References and select Add Reference...
When the references window appears, click on the Browse button and locate the Gorgon assemblies that you unpacked after downloading from Github.
To determine which assemblies you should use, go to this section.
Debugging
Gorgon has a separate debug version available for download. This is useful to help diagnose issues within Gorgon itself, and to turn on debug messaging from Direct 3D.
Before using the debug version, or any applications compiled against the debug version, you will need to have the Direct3D SDK Layers installed. To install the SDK layers, see the Graphics Tools section in the Compliing Gorgon article.
If this is not installed, the application will fail (the error message will indicate that the Direct3D SDK Layers aren't installed)
Note
The nuget packages for Gorgon do not contain a Debug version. You will have to go to the Github releases page to install it.